Congrats - you're about to take your analytics and marketing to the next level! There are a few steps that you must complete, so I decided to create this short step-by-step tutorial.
1. Add a custom subdomain
Adding a custom subdomain (e.g., https://sm.yourwebsite.com) is critical to bypass the ad blockers. Here is what you have to do.
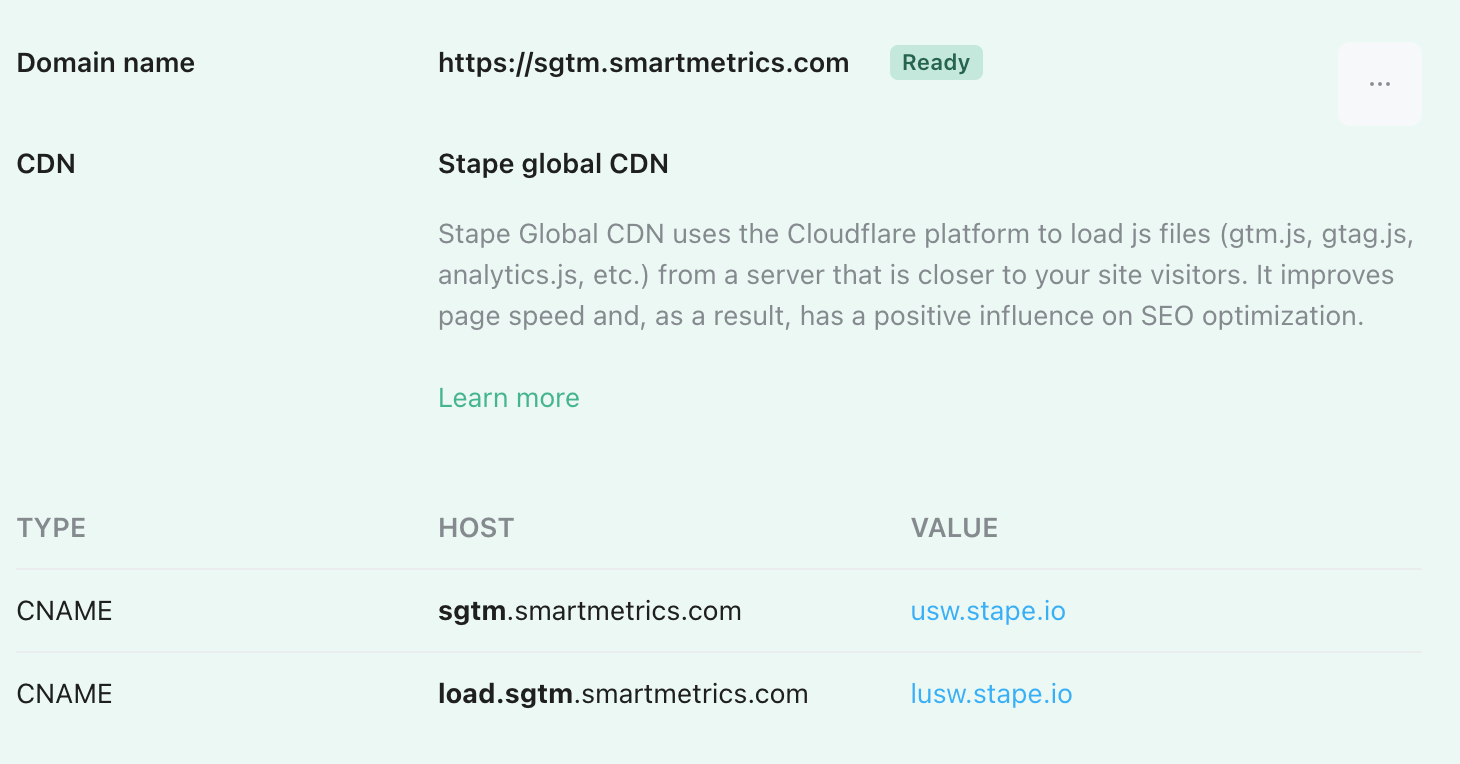
You should be able to access your own stape.io provisioned account (please check your inbox for the email from Stape). Go to your stape account -> sGTM container, and copy 2 CNAME values, it should look something like this:

Copy your 2 CNAME host + values, then add them to your domain registrar's DNS settings. If you use Cloudflare to manage your domain records, please check the additional steps here.
2. Generate a token (for Facebook CAPI only):
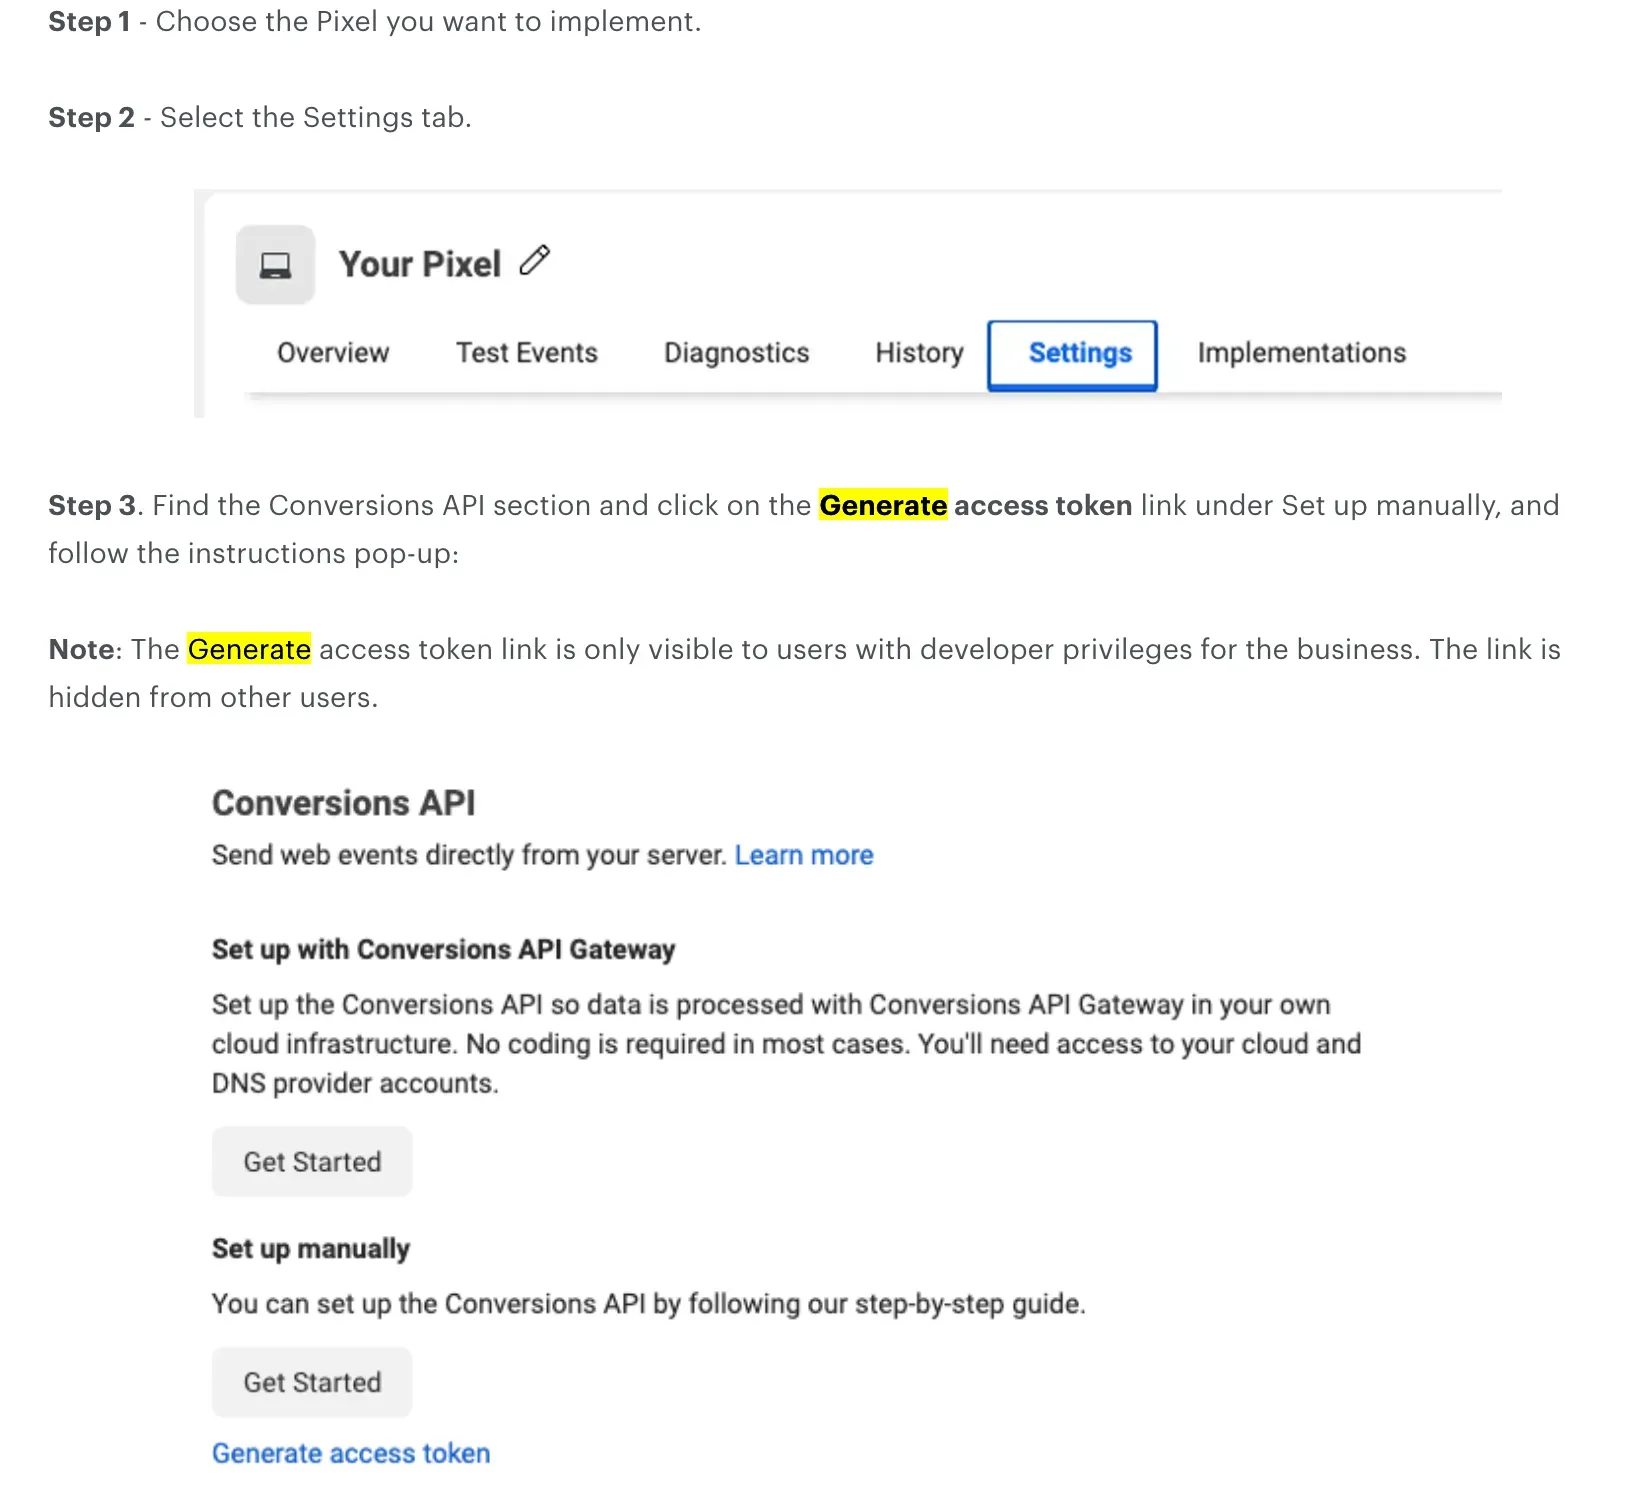
If tracking your Facebook conversions via Conversion API (CAPI) is part of this project, we must generate an access token. You can share access to your Facebook Ads account and dataset, and we can complete this task for you. Alternatively, you can follow these steps:

Click Generate access token, copy and share it with support@smartmetrics.com, that's it!
3. Replace your web GTM container on your website
Once the implementation is completed and tested, we have to replace your existing (if you use) Google Tag Manager (web) container with a new code so the container loads from your new subdomain. The easiest way for you is to share access to your website admin with support@smartmetrics.com so we can easily complete this task for you. If you want to replace the snippets yourself, please follow the instructions below:
- WordPress site - download and install the official Stape plugin from here
- Shopify site - install the official Stape app from here.
- Magento site - install the official Stape extension from here.
- BigCommerce site - install the official Stape extension from here.
- Other websites - get in touch with support@smartmetrics.com for the exact code snippets. We will generate and share them with you.
If you are using one of the Stape apps, you must add your Stape account values to the plugin after installing it. You can find those values in your stape account -> sGTM container dashboard.
Please also ensure you don't load any other scripts (e.g., additional Google Analytics 4, Google Tag Manager, Facebook) in your header - all the tags should be loaded via your newly created GTM container.
4.Upgrade your Stape.io plan for production
You currently (most likely) use a free Stape.io plan with a monthly quota of 10k/mo hits (across all platforms). A free plan is usually great during the implementation and testing, but once you move to the production site tracking, you must upgrade your plan to a paid (a $20/mo plan suits most of the mid-size traffic sites). The $20/mo plan has a 500k/mo quota, CDN, and other valuable features. Don't forget to upgrade, otherwise if you hit the limit, your tracking will stop!


